Friday 5 October 2012

Christmas Cards - 1

 This is the start of my Christmas Cards that I have made for Overseas Postage, 2012.  Where possible I have tried to keep the depth of the card to a minimum thus with a bit of luck I should be able to keep the cost of postage down.

This has proved to be a challenge for me as I like the layer and 3D effect in cards as I think it gives dimension and lifts the card to another level.

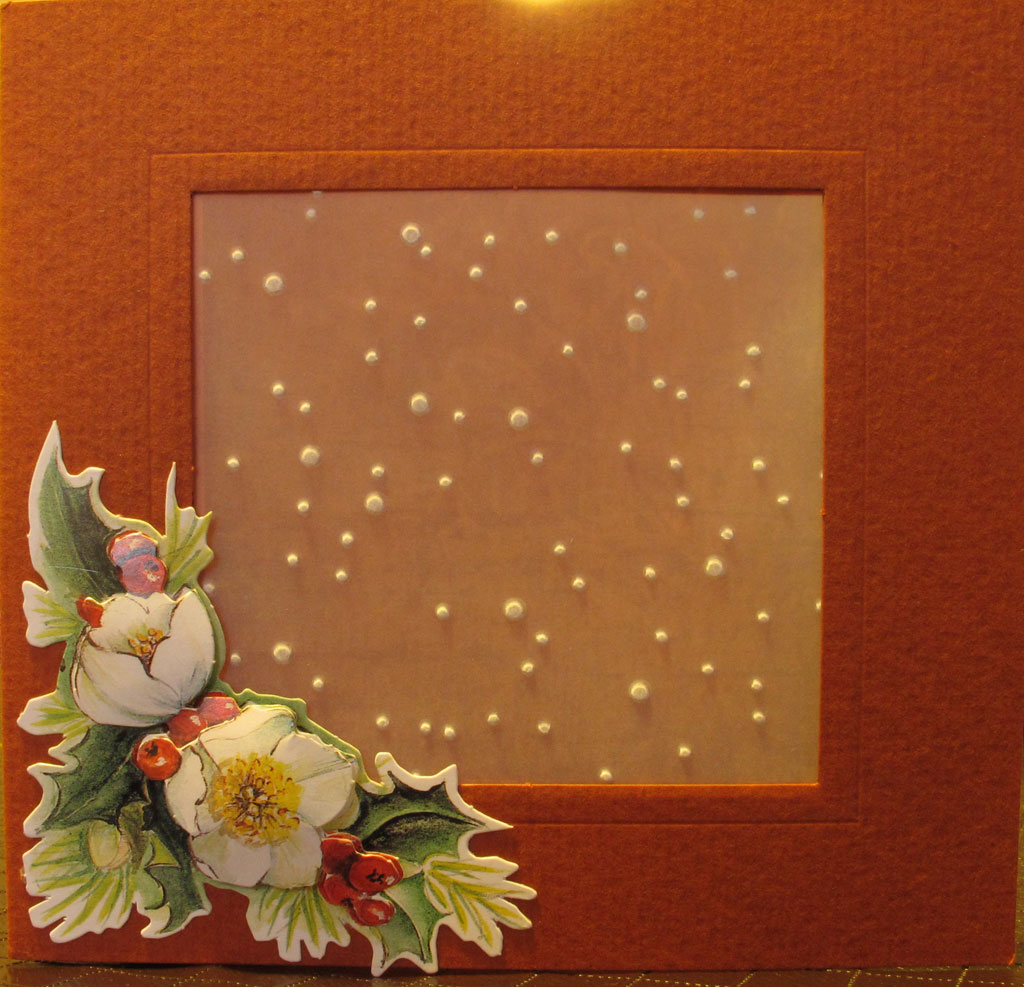
Anyway here is the first of the cards.  This is a pre-cut aperture card, and I have covered the opening with some velum that I embossed using the Cuttlebug snow fall embossing folder.  The decoupage I have used a small Christmas corner with a maximum of two layers.


This card I have used a simple triangle fold card.  This allows a square section of the card to stand out on its own.  It is very effective and just gives the card that little bit of magic.  What I like about this shape (and the instructions for this can be found on the Joanna Sheen tutorials page) is that I have managed to reduce the size so that it will fit in a normal square sized envelope.


The gold ribbon I picked up from a dollar shop and the holly flourish is cut from a Cheery Lynn Die.  The  white tape is from Marianne Design.  And the decoupage is from some things that I have lying around from last year.

Friday 29 April 2011

Mother's Day Card 2011


Hugs For You

This is the Hugs For You Card. I've tried to go back an edit the previous blog posting but site will not accept any changes.
This card is was done to say Thank You to some other friends that we shall be seeing on our visit to the US.

Butterflies 3


I got a lot of pleasure from making this card and I really hope the recipient likes it. The card was made as a Thank You Card to some friend shared their Easter with us.


The butterfly decoupage was from Papermania, the foil was from Debbie Moore.


I embossed the top and bottom of the card with a border from cuttlebug and coloured this using my promarkers pens. The decoupage was enhanced with some glitter glue and then a glaze was painted on top.


The foil vellum was stuck to the card by double sided tape, at the top and along where the decoupage sits. The top of the vellum was then covered with a strip of paper to hide the double sided tape.


Gem stones were then added to the borders along with a peel-off butterfly.

Poppies


This is a card that I have made to Thank some people in the States that shall be sharing their home with us during our visit there in a few weeks.
The card is made from La Pash Poppies easel design. I cut out the poppies from the square background and used my own background made from white and navy card stock. The white card I daub with blue ink to represent sky. The poppies I lacquered with 3D crystal glaze.
I also used a ribbon punch to create the square on the base of the card and inter weaved these together.
Last but not least was the addition of peel-offs and gemstones.

Saturday 23 April 2011

Hummel Card


This is a card that I made for Kay's birthday. She collects Hummel figurines and I thought a card with a Hummel figure would be a good idea.


Perfect Pearls has been used to create the swirls on the base card. Vellum has been used to create the "window" on the card. The window just behind the figure was stencilled and embossed with a V&A stencil. The flourish is from the Marianne Creatables Series.


Then gemstones and glitter glue was added to the flourish along with peel off borders around the first "window"


Feedback from Jackie is a suggestion that I use black pen or a black ink pad to paint the edges of the cut decoupage. So when I do my decoupage card; I will try this.

Tuesday 12 April 2011


This is a card that I did at Tash's class. It was very simple to do and the card looks very elegant.


This is not my design all credit goes to Tash for this one, but I just had to show it off.